Arduino 101 Curie Timer One Interrupt
With this tutorial you learn to use one of the timers available in the microcontroller on the 101.
With this tutorial you learn to use one of the timers available in the microcontroller. The library uses Timer 1 and this tutorial shows how to set up an interrupt at variable intervals to toggle the on-board LED. The interrupt is the only way to exit from a delay() function and it is used in this sketch to show how a delay instruction - that apparently stops the flow of the code execution - is temporarily exited to toggle the LED, then it is continued from where it was interrupted. The final effect is a 10 seconds blinking block with the same blinking rate, incremented every 10 seconds in four steps.
Hardware Required
The Circuit

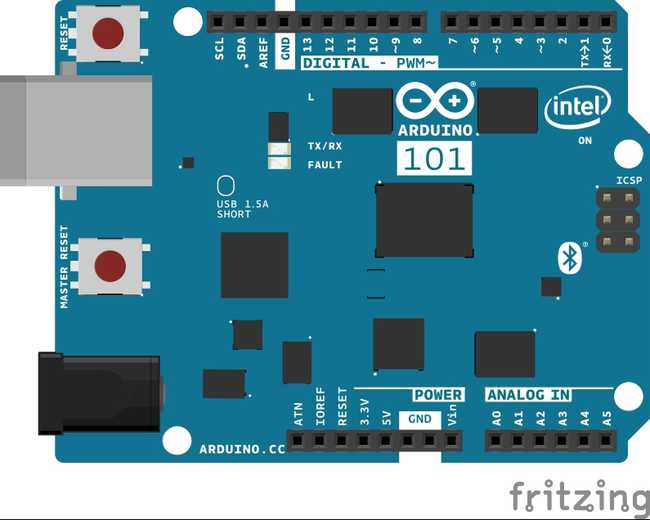
image developed using Fritzing. No additional hardware is needed to use this tutorial.
Software Essentials
Libraries
CurieTimerOne.h is the library that provides access to the Timer 1 of the microcontroller. This library allows to set up the number of microseconds that the timer counts before it asserts an interrupt. The interrupt can be configured to call a specific function - the callback function - and each interrupt increments a counter. The same library is used to generate a PWM signal with duty cycle and period length fully customizable.
Functions
timedBlinkIsr() - is the function to which the sketch execution is passed when the interrupt is asserted. It toggles the state of the LED on D13 using the toggle variable that is changed using the "!" (NOT) operator at each call.
Code
The code is written with a serial monitor feature that can be toggled commenting or uncommenting
#define SERIAL_PORT_LOG_ENABLE 11/*2
3 Sketch: Timer1Interrupt.ino4
5 This sketch demonstrates the usage of the Curie Timer One Library.6
7 It uses timer-1 to blink the onboard LED, pin 13, at different8
9 intervals (speed) in four steps.10
11 You can see the time interval and the number of interrupt counted12
13 in 10 seconds if you keep serial logging active, but this may require14
15 a MASTER_RESET to reprogram the board.16
17 Blinking of the LED will start only when you open the Serial Monitor18
19 unless you comment the "#define SERIAL_PORT_LOG_ENABLE 1"; don't20
21 forget to uncomment "CurieTimerOne.restart(time);"22
23 created by Intel24
25 Modified 14 March 201626
27 by Simone Majocchi28
29 This example code is in the public domain.30
31*/32
33#include "CurieTimerOne.h"34
35// Comment the following statement to disable logging on serial port.36#define SERIAL_PORT_LOG_ENABLE 137
38const int oneSecInUsec = 1000000; // A second in mirco second unit.39
40bool toggle = 0; // The LED status toggle41int time; // the variable used to set the Timer42
43void timedBlinkIsr() // callback function when interrupt is asserted44{45
46 digitalWrite(13, toggle);47
48 toggle = !toggle; // use NOT operator to invert toggle value49}50
51void setup() {52
53#ifdef SERIAL_PORT_LOG_ENABLE54
55 Serial.begin(115200); // initialize Serial communication56
57 while (!Serial); // wait for the serial monitor to open58#endif59
60 // Initialize pin 13 as an output - onboard LED.61
62 pinMode(13, OUTPUT);63}64
65void loop() {66
67 for (int i = 1; i < 9; i = i * 2) {68
69 // We set a blink rate of 1000000, 500000, 250000, 125000 microseconds70
71 time = oneSecInUsec / i; // time is used to toggle the LED is divided by i72
73 CurieTimerOne.start(time, &timedBlinkIsr); // set timer and callback74
75#ifdef SERIAL_PORT_LOG_ENABLE76
77 Serial.print("The blink period: ");78
79 Serial.println(time);80#endif81
82 delay(10000); // 10 seconds of delay, regularly 'interrupted' by the timer interrupt83
84#ifdef SERIAL_PORT_LOG_ENABLE85
86 Serial.print("Total number of ticks in 10 seconds: ");87
88 Serial.println(CurieTimerOne.rdRstTickCount()); // Reads and Resets tick count89
90 Serial.println("----");91#endif92
93 // Uncomment the following line if the serial logging is disabled94
95 // CurieTimerOne.restart(time); // Restarts Timer96
97 }98}Last revision 2016/03/13 by SM
Suggest changes
The content on docs.arduino.cc is facilitated through a public GitHub repository. If you see anything wrong, you can edit this page here.
License
The Arduino documentation is licensed under the Creative Commons Attribution-Share Alike 4.0 license.