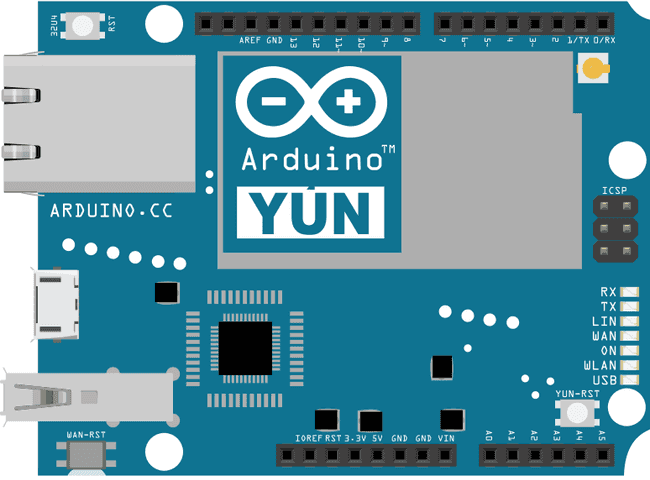
Arduino Yún File Write Script
Demonstrates how to write and execute a shell script with Process.
This example writes to a file using the FileIO classes into the Yún device's filesystem. A shell script file is created in /tmp, and is executed afterwards.
Hardware Required
- Yún board or shield
Circuit
There is no circuit for this example.

image developed using Fritzing. For more circuit examples, see the Fritzing project page
Code
Include the FileIO header, for communicating with the filesystem.
#include <FileIO.h>In
setup()uploadScript()loop()1void setup() {2
3 Bridge.begin();4
5 Serial.begin(9600);6
7 while(!Serial); // wait for Serial port to connect.8
9 Serial.println("File Write Script example\n\n");10
11 FileSystem.begin();12
13 uploadScript();14}loop()runScript()1void loop() {2
3 runScript();4
5 delay(5000);6}Your
uploadScript()File@ class, and calling1void uploadScript() {2
3 File script = FileSystem.open("/tmp/wlan-stats.sh", FILE_WRITE);Write the contents of the script to the file with
File.print()ifconfiggrepifconfig1script.print("#!/bin/sh\n");2
3 script.print("ifconfig wlan0 | grep 'RX bytes'\n");4
5 script.close(); // close the fileInstantiate a Process to make the script executable.
chmod@ is a command that will change the modes of files. By sending the1Process chmod;2
3 chmod.begin("chmod"); // chmod: change mode4
5 chmod.addParameter("+x"); // x stays for executable6
7 chmod.addParameter("/tmp/wlan-stats.sh");8
9 chmod.run();10}The
runScript()Process.begin(filepath)Process.run()1void runScript() {2
3 Process myscript;4
5 myscript.begin("/tmp/wlan-stats.sh");6
7 myscript.run();Create a string to hold the output, and read the output into it
1String output = "";2
3 while (myscript.available()) {4
5 output += (char)myscript.read();6
7 }Remove the blank spaces at the beginning and end of the string and print it to the serial monitor :
1output.trim();2
3 Serial.println(output);4
5 Serial.flush();6}The complete sketch is below :
1/*2
3 Write to file using FileIO classes.4
5 This sketch demonstrate how to write file into the YunShield/Yún filesystem.6
7 A shell script file is created in /tmp, and it is executed afterwards.8
9 created 7 June 201010
11 by Cristian Maglie12
13 This example code is in the public domain.14
15 http://www.arduino.cc/en/Tutorial/FileWriteScript16
17 */18
19#include <FileIO.h>20
21void setup() {22
23 // Setup Bridge (needed every time we communicate with the Arduino Yún)24
25 Bridge.begin();26
27 // Initialize the Serial28
29 SerialUSB.begin(9600);30
31 while (!SerialUSB); // wait for Serial port to connect.32
33 SerialUSB.println("File Write Script example\n\n");34
35 // Setup File IO36
37 FileSystem.begin();38
39 // Upload script used to gain network statistics40
41 uploadScript();42}43
44void loop() {45
46 // Run stats script every 5 secs.47
48 runScript();49
50 delay(5000);51}52
53// this function creates a file into the linux processor that contains a shell script54// to check the network traffic of the Wi-Fi interface55void uploadScript() {56
57 // Write our shell script in /tmp58
59 // Using /tmp stores the script in RAM this way we can preserve60
61 // the limited amount of FLASH erase/write cycles62
63 File script = FileSystem.open("/tmp/wlan-stats.sh", FILE_WRITE);64
65 // Shell script header66
67 script.print("#!/bin/sh\n");68
69 // shell commands:70
71 // ifconfig: is a command line utility for controlling the network interfaces.72
73 // wlan0 is the interface we want to query74
75 // grep: search inside the output of the ifconfig command the "RX bytes" keyword76
77 // and extract the line that contains it78
79 script.print("ifconfig wlan0 | grep 'RX bytes'\n");80
81 script.close(); // close the file82
83 // Make the script executable84
85 Process chmod;86
87 chmod.begin("chmod"); // chmod: change mode88
89 chmod.addParameter("+x"); // x stays for executable90
91 chmod.addParameter("/tmp/wlan-stats.sh"); // path to the file to make it executable92
93 chmod.run();94}95
96// this function run the script and read the output data97void runScript() {98
99 // Run the script and show results on the Serial100
101 Process myscript;102
103 myscript.begin("/tmp/wlan-stats.sh");104
105 myscript.run();106
107 String output = "";108
109 // read the output of the script110
111 while (myscript.available()) {112
113 output += (char)myscript.read();114
115 }116
117 // remove the blank spaces at the beginning and the ending of the string118
119 output.trim();120
121 SerialUSB.println(output);122
123 SerialUSB.flush();124}Last revision 2016/05/25 by SM
Suggest changes
The content on docs.arduino.cc is facilitated through a public GitHub repository. If you see anything wrong, you can edit this page here.
License
The Arduino documentation is licensed under the Creative Commons Attribution-Share Alike 4.0 license.